Keywords:Context Switching; Scheduler; Kernel; OS Timer; Embedded System
1. Introduction
With an explosive increase of the development of the embedded systems with which OS is mounted, the development of independent OS became more significant. However, in most cases, companies and individuals that develop embedded systems create only device drivers and release the products. It seems that few companies and individuals are interested in the independent OS development. Of course, we can think that the main factors of this phenomenon require a lot of development costs and time, probably. So we present the miniOS kernel made via the implementation of the context switching and the scheduler for an embedded system based on ARM core (ARM 920T). Today, saying that all OSs support the multitasking is not an exaggeration. Generally, the embedded OS can be divided into five parts as follows [1]:
1. Process (task) Management: thread, process, scheduling, synchronization, inter process communication (IPC)
2. Memory Device Management: memory, virtual, file system 3. Networking: TCP/IP, various protocol 4. User Management: user account, access authority 5. Device Driver: serial access, random access, network The context switching and the scheduler in the OS that supports the multi-tasking are the most significant core parts. Thus, in this study, we present the implementation of the miniOS kernel that can operate the context switching and the scheduler [2]. Of course, we tried to write about the function concisely and easily for people to understand it as well as possible. We did not use any complex algorithm in the algorithm implementation. In implementing the miniOS kernel, we used easy instructions for the assembly instructions that should be inevitably used as well. In this study, we utilized EZ-X5 board equipped with the main processor, PXA255 chip of ARM92 series. Also EZ-X5 is equipped with NAND Flash memory 64MB and SDRAM 64 MB and it has an Ethernet controller, a USB controller, and other peripheral devices. Section 2 presents an overview and implementation of the context switching. In Sections 3 and 4, the context switching and the scheduler implementation process are presented with sources. A practical example with the results obtained in this study is presented in Section 5. Finally Section 6 contains the conclusions and future work.
2. Context Switching and Scheduler
2.1. Multitasking
Operating systems such as Windows or Linux are multitask operation systems [3]. So when you use operating systems, it is possible for us to fulfill multiple tasks at the same time. For example, while listening to music, we can create documents with a word processor. Also even while finding resources we need for making our documents through the website search by launching the web browser, if a friend talks to us through a messenger, we can chat with the friend for a while. We feel like that all of these tasks run at the same time. However, in reality several programs are not operating at the same time since the processor (CPU) can run only one program at a time. Therefore, physically processors as many as programs running concurrently are needed in order that several programs operate at the same time. But multitasking works well in a computer with a single processor as well.
Then, although a processor can perform only one command at a time, how can multiple commands be performed simultaneously? Even in a computer with a single processor, multi-tasks can be operated smoothly because the processor is very fast. The processor executes tasks which run currently very fast and alternately. For this reason, to the person who perceives slowly compared to the processor, the tasks look likely to operate simultaneously. This concurrent operation can be thought to be a timesharing system [4].
2.2. Context Switching
Operating system supporting the multi-tasking, according to certain rules, continues to switch the task that has the context in the current processor at regular time intervals. Here, the behavior that changes the context of a task in the processor into the context of another task. Also, switching tasks requires certain rules, which are under the responsibility of the scheduler to be explained in the following.
There are registers from r0 to r15 and spsr (saved program status register) in the context of the ARM. When we implement the context switching between a task and ISR (Interrupt Service Routine), we recover the context of the task after backing it up into the stack of ISR because there was only one task to be addressed. However, when we implement the context switching between tasks, we should back up the context of the current processor into the TCB (Task Control Block).
Then, we can recover it from the processor after taking the context from the TCB of a different task. In order to prepare for this like process, the task control block should be implemented. The context switching should be made at regular time intervals. Thus OS is also associated with a timer. Furthermore, since OS timer operates as IRQ (Interrupt Request), the context switching is implemented in the IRQ handler. Figure S1 shows the structure of context switch [5,6].
2.3. Scheduler
The scheduler plays a role to determine the next task that be switched to the context switching. Several kinds of scheduling techniques have been developed and operating system can be selected and used in accordance with the purpose of developing. The overall transition process of the task is as follows: first of all, backing up the context of the task running currently into the TCB of the right task. Secondly, by calling the scheduler, making it choose the next task to work. Thirdly, putting the context brought from TCB of the task which is selected like this into the register of the processor. Lastly, the newly named task is executed.
3. Implementation of Context Switching
3.1. IRQ Handler
In OS, the context switching should be occurred periodically. Thus, OS handles the context switching whenever operation OS timer. By using a stack in IRQ handler when implementation OS timer, it was treated an ISR and a context switching (see Code 1).
This part will be replaced with the context switching code by using TCB. A context switching process implemented in IRQ handler can be divided into three parts. The first process is making IRQ disable in order that interrupts are not overlapped. The second one is backing up register values of the processor into the task control block, and that depending on the type of an occurred IRQ, the C language handler function determines a task switch. The third one is putting the context data received from TCB of the task to be performed next time into the processor and jumping into the working position of the right task. Each part of Code 1 will be discussed in each section.
3.2. Task Context Backup
First, Code 2 (a part of Code 1) is that the context of the
Code 1. Context switching.
Code 2. Task context backup.
currently running task is backed up.
In the first line, the part to modify cpsr is for making IRQ disable in order not to occur Interrupt. To handle nested Interrupt, various situations should be considered and additionally code becomes more complicated. In this subsection, we will describe how to implement both the way that allows nested Interrupt and the way that does not allow it. In the way that does not allow nested Interrupt, after Interrupt occurs and it enters an ISR (Interrupt Service Routine), the next interrupt does not occur until the end of ISR. Therefore, when a programmer creates the ISR, the programmer must be careful not to execute too much long time operations or operations such as running an infinite loop by mistake, and so on.
On the other hand, the first purpose of the allowed nested interrupt handler is to react quickly to interrupt. In other words, it is possible that a handler does not need to wait for interrupts which occur asynchronously and Interrupts does not need to wait for the handler either. The second purpose is not to delay an execution of code occurring simultaneously and regularly while various interrupts are served. If possible, the handler always checks stacks and it should prevent breakage of registers.
The entry code of allowed nested interrupt handler is the same as a simple interrupt handler, but a different point is that nested interrupt is not allowed to test the flag updated by ISR when it exits the handler. The flag tells whether we need to handle another interrupt or not. If we do not have any part to handle, the interrupt service routine is completed and the handler finishes working. Otherwise, if we still need to process an interrupt, the handler can re-enable the interrupt and carry out some works to perform a context switch. Re-enabling the interrupt includes the work of converting to SVC and System Mode in IRQ Mode.
Since in IRQ Mode, only the register r14 is accessible and the original value of this register might be broken by an overwritten new value, if the interrupt occurred by using the bl instruction (Code 1), making IRQ reenabled should be cautious. Since while the data are on IRQ stack, the handler is not able to perform a context switch, IRQ stack should be empty so as to perform a context switch. Here, all registers stored in IRQ stack are usually sent to SVC stack (or stack of the task) and these are sent to the block of memory allocated on the stack named as “stack frame” as well. TCB_PtrCurrentTask variable number will be explained in detail in the section of scheduler. The following code (Code 3) is a part of Code 1.
The above two lines put the value of a pointer of TCB_PtrCurrentTask obtained through reading into the stack pointer (sp). In other words, they bring the address value of the pointer and the value of a pointer variable is the address value of the memory. Thus, the address value taken from TCB_PtrCurrentTask is the address of the TCB of the task currently operating, as it were, it is the address value of the memory which is located in variables of Mini_free_task structure (see Figure 1).
USER mode and IRQ mode share registers except for the stack pointer (sp) and the link register (lr) (ref. ARM920T Usre’s manual). Besides, the address to which
Code 3. Save miniOS pointer to stack pointer (sp).

Figure 1. TCB_PtrCurrentTask pointer variable.
ISR has to return is stored in lr. So, the register which is freely available in IRQ mode is only sp. For this reason, sp is used as an index address of stima. The following code (Code 4) is a part of Code 1.
Code 5 is the part of backing up registers of a processor into TCB. In the first line of sources, 4 bytes are subtracted from the lr with the return address. It is a crucial difference between SWI to enter the interrupt by using the SWI command and IRQ to occur in hardware. In order to understand this, ARM’s pipeline structure and the point at which occurred each the exception should understand. In the next line, four is added to the stack pointer pointing to the location of the start of TCB.
As a result, sp will skip the space of the context_spsr variable and point to the first address of the context [CONTEXTNUM] array. The order to back up 13 register values from r0 to r12 into the context array is the command, stima sp! {r0-r12}^. Then, it backs up the values of sp and lr of USER mode into the context_sp, context_lr. Finally, it makes a backup the values of the lr of IRQ mode, the address to go back into the remaining context_pc. The following code (Code 6) is a part of Code 1.
In the above two lines, the link registers of each line are different each other. In stima, when we address, the specified register by attaching the end caret (^) is USER mode register. If nothing, it reads registers of operation mode (sp and IRQ mode in the above sources) specified in cpsr. Therefore, the first line of code is a command storing sp and lr of USER mode into the memory. Then 68 bytes are subtracted from sp.
Code 4. The part of backing up registers of processor of Code 1.
Code 5. TCB task header file.
Code 6. User mode (Read IRQ mode register).
Since the current context_pc is filled with values, in order that sp points to the context_spsr, 17 words should go backward. In a 32-bit environment, 17 words are 68 bytes. In that state, after reading the values of spsr to r1, the value of r1 is written to the memory pointed by the stack pointer. Here, because r1 was already backed up in the previous step, even if a different value replaces it, which does not matter. Resultantly, spsr of IRQ mode is backed up into the context_spsr. Through the above process, all contexts stored in the current processor were backed up into TCB. Then enter into IRQ handler function written in C language.
3.3. Entry of IRQ Handler Function
The sp is returned to the initial value of the stack assigned to IRQ mode by putting the TCB_IRQStack value back because it was used to back up the context at the sources of the top. And it enters irqHandler() function by bl command. The contents of irqHandler() function will be discussed after a while. After we completed the IRQ handler function written in C language, we should recover the context again. The following code (Code 7) is a part of Code 1.
3.4. Recovery of Task Context
The following source code (Code 8) is a part of Code1 and shows recovery of task context.
TCB_PtrNextTask variable is also a global pointer variable of all the kennel areas. The scheduler determines the task to operate after the current task is backed up. In miniOS kernel the pointer to TCB of the task determined by the scheduler is assigned to a TCB_PtrNextTask variable. The first two lines bring the address of task control block to the stack pointer through a pointer variable and work on the same principle as dealing with TCB_ PtrCurrentTask variables.
As shown in Figure 2, one working register should be used in order to recover spsr. So, the spsr must be recovered at first before repairing work registers. And only through that way, the working registers can be fully re-
Code 7. Set IRQ stack.
Code 8. Task context recovery.

Figure 2. Recovery context from task control block.
covered without being damaged. That’s the reason why in TCB, the context_spsr is located on the most top. Next, the first four bytes of TCB are read as r1. The first word of TCB (four bytes in 32-bit systems) is the context_spsr. In this way, the spsr of that right task is backed up into r1 and it is restored to the spsr of a processor. 13 registers from r0 to r12 are restored as processors in the task control block as well. In the same way, r13(sp), r14(lr) are restored. In addition, the return address put in the context_pc when the context was backed up previously is restored into a pc. As a result, by the above procedure, the processor execution flow jumps to the return address with completion of the right command at the same time. spsr is also recovered into the cpsr and returns to USER mode. Lastly, when we use the caret(^) at addressing parts of ldmia instruction, if we have a pc in the register list, it jumps to the value stored in the pc and simultaneously spsr is restored into the cpsr.
4. Implementation of Scheduler
The scheduler in the core of the OS plays the biggest role. Multi-tasking scheduler is implemented in a context switching method. We will describe on a scheduling, the process of determining a task to switch, independent of the context switching that switches between tasks. Each OS (Operating System) has its own scheduling policy and the scheduler algorithm is made in the form of the most satisfying this scheduling policy. There is the way of round-robin, which is the most basic scheduler way, and there is Linked-list scheduler as a high-quality way. Linkedlist algorithm is shown appendix (ACode 6).
4.1. Scheduler Strategy of OS
For instance, RTOS (Real Time OS) gives the priority to the task and uses the scheduling policy that ensures the execution time. In this case, according to the priority policy by the scheduler, the task of the high priority should be allowed to keep occupying the processor. And exceptionally, the case that the low-priority task has to be executed earlier than the higher-priority task should be handled. In order to facilitate this process, the scheduler algorithm must be created in considering a number of various cases. Moreover, in the case of the operating system that uses the priority, the situation that some tasks of the low-priority which did not receive the scheduling for a long-term period stay continuously in a standby state can occur. The scheduler is charge of finding these tasks and adjusting the priority to be executed appropriately as well. In addition to that, the scheduler makes computerintensive tasks be done earlier by temporarily lowering the priority of the tasks which work for a long time, as the disk IO, and so on. Like this, the operation to increase the overall response of a system is also the role of the scheduler.
4.2. Implementation of Round Robin Scheduler
Depending on the scheduling strategies, there are a lot of scheduling algorithms. An easy-to-implement algorithm of many algorithms can be said to be a round-robin algorithm. In this study, the scheduler which adopted the round-robin algorithm will be implemented. Of course the roles of the scheduler are very diverse, but the most important role of it is to determine a task to be performed after a current running task. So, the scheduler to implement will be designed to determine only one task to be performed next. As can be seen from Figure 3, the round-robin algorithm selects the tasks existing in a circular list one by one and orderly, going around in a circle.
The round-robin scheduler is the method to choose the next task regardless of a current status or the priority of the task. The following Code 9 is about implement sources of the round-robin scheduler. TCB_PtrCurrentTask and TCB_PtrNextTask as pointer variables of a Mini_free_ task structure are variables of the context switching code. The following code is about the sources of the scheduler function.
TCB of a current running task is always pointed by the TCB_PtrCurrentTask pointer variable. TCB of the task run next that is selected by the scheduler is always pointed by the TCB_PtrNextTask pointer variable. The miniOS kernel is booted for the first time in the TCB (Task Control Block), also, the first user task that is dis-
Code 9. Scheduler code.
carded after several initialization work is assigned into the TCB, which is used as a sort of trash bin to discard the previous register values contained in the processor.
The TCB_current_index is a variable with the index of the task currently running in the free task block list. When the round-robin scheduling, the scheduler determines a task to be selected next, increasing this variable one by one. But the value of the TCB_current_index should not be larger than the max_task_id of the task manager. If TCB_current_index becomes greater than max_task_id, it should be returned back to the index 0.
Because of the round-robin scheduling, a task to be performed next is the task which is located in the next index of the free task block. So, it increases one miTCB_current_index variable. However, by just increasing, the round robin is not performed.
Therefore, the TCB_current_index variable and the task_manage.max_task_id variable have to be zero again by the MOD operation, if the size of the index variable becomes the maximum value. The pointer of TCB with the conformed TCB_current_index variable as an index is assigned into the TCB_PtrNextTask pointer. In the above sources, since the miniOS_current_ index is increased, TCB address of the task to be performed next is put into the TCB_PtrNextTask pointer.
4.3. Scheduler Initialization Code
In this section, we will describe on the initialization code of the scheduler (Code 10).
If task_manage_max_id increasing one by one whenever a task is registered is less than 0, because this means that none of the user task in registered, there is no subject
Code 10.Scheduler initialization.
to be scheduled. If there is no user task, that an embedded OS is booted has no meaning. So, we return −1 which means an error, and the initial value of the TCB_PtrCurrentTask pointer becomes equal to the address of the TCB, a global variable to use as a trash bin.
From now on, we will discuss on the context switching code (Code 2) of Section 3.2. If start the context switching for the first time, the values of the current processor’s registers are backed up at the location of the address that pointed by the TCB_PtrCurrentTask pointer. In the context switching, because the processor’s values have nothing to do with the values of the user task, they are thrown away as garbage values, in the same way that the initial value of the TCB_PtrCurrentTask pointer is assigned to the TCB. The initial value of the TCB_PtrNextTask is the first index of the free task block list. When we boot, after discarding the initial values of the processor’s registers, the values to enter the register of the processor should be the context of the first list. So, the initial value of the TCB_PtrNextTask is the pointer of the task control block of the first task. As soon as it enters the scheduler function (Code 4), since one TCB_PtrNextTask value is increased, the initial value of this variable is set to −1.
4.4. Main Function of miniOS Kernel
Scheduler_init() function as initialization function of the scheduler should be performed after the user task is registered in the kernel, only then, because the value of the task_manage.max_task_id can be obtained accurately. So, the position to call it should be in the next place of the miniOS_user() function [7,8]. The kernel main() function is as the following (Code 11).
After the scheduler_init() function is called, if the return value is negative, booting is stopped, coming out the message, “miniOS kernel error.” As a result, because there is not principal to do the work, the kernel cannot proceed further.
4.5. OS Timer Handler
The position of the implemented schedule is very important. As mentioned in the previous section, the operation
Code 11. Main function of miniOS kernel.
of the context switching should be linked with OS timer. Therefore, the implemented scheduler should be called in the OS timer handler. The irqHandler() function of the miniOS.c is implemented as shown below (Code 12).
The values of the TCB_PtrNextTask and the values of the TCB_PtrCurrentTask are equal until the scheduler is called. So, if there is another IRQ, instead of OS timer, even it goes in and out to the IRQ handler, a task switch does not occur. The reason is because the current task and the next task are assigned to the same task. Only when the OS timer occurs and it goes in and out to the IRQ handler, the TCB_PtrNextTask is selected by the scheduler. Eventually, as the current task and the next task are specified as different tasks, the task switch is performed. The total code of the miniOS Kernel is shown appendix (ACode 1).
4.6. USER Task
The user task in the embedded OS is the program which is not be terminated, like OS. Also, the user task function should not be terminated, instead, it should include an infinite loop code inside itself. The user task function is shown in appendix (ACode 5). Figures 4 and 5 are shown memory map.
5. Test of miniOS Kernel
In this section, we will explain a build and test on the implemented miniOS kernel and show the results of running the miniOS kernel. The following results show the
Code 12. OS timer handler.

Figure 4. Memory address allocated to user task.

Figure 5. Boot and miniOS kernel memory map.
outcomes obtained by booting after mounting the miniOS kernel image obtained by running the Makefile on the EZ-B/D. In Figure 6, as the test results, that numbers of output values come out in order of 1, 2, and 3 can be verified. And we can see from the above test results that tasks, 1, 2, and 3 are repeated after running three tasks. That correct output values come out means that the context switching also works very well. As a result, that the implemented round-robin scheduling operates exactly can be verified.
Figure 6. The results of build and test.
6. Conclusion
In this study, we presented how a context switching and a scheduler in OS should be implemented through the actual resources. To be a multi-tasking OS, essentially, the context switching and the scheduler should be implemented. And since the miniOS kernel also manifests the multitasking embedded OS, the context switching and the scheduler were implemented. In Section 3, we explained the concept of the context switching and what strategies should be applied to the context switching in ARM is examined through the actual codes. We also implemented the scheduler associated with the context switching by using the simplest form of the round-robin algorithm and checked the results coming from operating the user tasks in an infinite loop function. Moreover, we verified that the stack allocation was made accurately based on the results of the output values of the user task function. In the future, we will implement more concrete and practical context switching and linked-list scheduler, and we will be able to handle interrupt which allows nested interrupt.
ACode 1. Total source code of the miniOS kernel.

Figure S1. Structure of context switch.
[A3] The following code shows source code of the entry point for miniOS Kernel.
ACode 2. Source code of the entry point for miniOS Kernel.
[A4] The following code show the source code of the memory manager function miniOS_memory.h and miniOS_memory.c
ACode 3. Source code of memory manager function.
[A5] The following code show the source code of the task manager function miniOS_task.h and miniOS_ task.c.
ACode 4. The source code of the task manager function.
[A6] The following code show the source code of the user task.
ACode 5. Source code of USER task.
[A7] The following code is linked-list source code for tasks. This source code is linked-list algorithm considering the priority of the tasks. We must know the address of the previous task which was right ahead in order to insert the new task selected in the order of priority into the linked-list. The source code (ACode6) finds out the address of the previous task which was right ahead as an example to insert a new task into the linked-list. Here, it is assumed that the task 1 is the highest and the task n is the lowest in terms of the priority order. That is, the priority order of tasks is 1 > 2 > 3 > 4 > 5 > … > n. Linked-list algorithm can be used in scheduler algorithm.
ACode 6. Source code of linked-list algorithm.
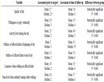
The following 1), 2), 3), 4), and 5) show cases that the new task can be inserted to the linked-list in the order of priority for ACode6.
1) The following figure shows the case that the new task is at the very front for the first time in the situation that there is not any task in the linked-list.

2) The following figure shows the case that according to the priority, the new task is at the very front in the situation that there is one task in the liked-list.

3) The following figure shows the case that the new task is between existing tasks in the liked-list in the order of priority.

4) The following figure shows the case that according to the priority, the new task is at the very end of the linked-list.

5) The following figure shows finds out the address of the previous task which was right ahead as an example to insert a new task into the linked-list.
